
SQL Always Encrypted can leverage Azure Key Vault for the encryption of sensitive data within an Azure SQL Database. The question may arise, how do I grant or deny access for the encryption and decryption of this data? This article shows how to leverage an Azure Key Vault to encrypt sensitive specific sensitive column data and how you can provide access to specific users or applications the ability to decrypt this data.
An excerpt from the official documentation as to what Always Encrypted is:
Always Encrypted is a feature designed to protect sensitive data, such as credit card numbers or national identification numbers (for example, U.S. social security numbers), stored in Azure SQL Database or SQL Server databases. Always Encrypted allows clients to encrypt sensitive data inside client applications and never reveal the encryption keys to the Database Engine (SQL Database or SQL Server). As a result, Always Encrypted provides a separation between those who own the data and can view it, and those who manage the data but should have no access. By ensuring on-premises database administrators, cloud database operators, or other high-privileged unauthorized users, can’t access the encrypted data, Always Encrypted enables customers to confidently store sensitive data outside of their direct control. This allows organizations to store their data in Azure, and enable delegation of on-premises database administration to third parties, or to reduce security clearance requirements for their own DBA staff.
Prerequisites
The following items are needed:
- Azure SQL Server (PaaS) set up initially for SQL Login
- Azure SQL Database (PaaS)
- Azure Key Vault
- A Windows machine with SQL Server Management Studio (SSMS) installed. I will be using an Azure Virtual Machine with these tools installed. You can download the SSMS tools here. At the time of writing this article, I am using Release 18.4 of SSMS.
- Two Azure AD Accounts. One which would be the Azure AD Account of the SQL Administrator and one would be another Azure AD Account that will initially be denied access for column decryption and then later granted access to decrypt.
Creating Test Server & Database
I’m not going to go through the entire Step-By-Step on creating an Azure SQL Server & Database as it is out of scope for the purpose of this article. But I will outline the configuration options I am choosing when creating the Server and the Database.
When creating the SQL Server under the Basics tab of “Create SQL Database”, I chose the following options:

When creating an Azure SQL Database, there is an option to use a Sample Database. When you get to the Additional settings page, choose Sample for “Use existing data” and it will load AdventureWorksLT as the sample database.

After your SQL Server and SQL Database have been created, you can navigate to your SQL Server, click on SQL Databases, and you should see your database’s status be displayed as Online.

Connecting to Test Server & Database
With SSMS launched, let’s connect to our Azure SQL Server & Database. During the creation of the SQL Server & Database, we specified the username and password which will be the credentials we use to connect using the SSMS tools. We also see the Server name we will use to connect when we go to our SQL Server in the Azure Portal.

We will use these credentials and SQL Server FQDN to connect to our SQL Server within SSMS.

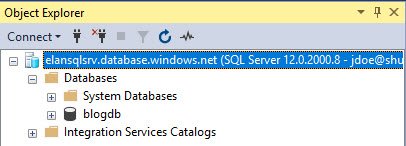
After successfully connecting, we can see all the SQL Tables from AdventureWorksLT.

Right-Click the SalesLT.Customer Table and choose “Select Top 1000 Rows.”

This will execute a SQL Query and display the results as such:

Now let’s say there is a desire to encrypt the EmailAddress and Phone columns unless you are authorized access to decrypt this data. That is where Always Encrypted comes in. So let’s dive in with how we accomplish this and how access is granted or denied.
Encrypting EmailAddress and Phone Columns using Always Encrypted
Click on the same SalesLT.Customer Table. This time, instead of selecting the top 1000 rows, we’ll choose the option to Encrypt Columns.

Under Column Selection, choose the EmailAddress and Phone Column and select the encryption type.

This blog article here does a great job of explaining the two encryption types, Deterministic vs Randomized. What the blog author writes is:
For Encryption Type, we need to select between Deterministic and Randomized. The basic rule here is that deterministic encryption is less secure yet allows you to perform grouping, filter by equality, and joining tables on encrypted columns. Deterministic Encryption produces the same encrypted value for any given plaintext value. Randomized encryption generates different encrypted value for the same plaintext each time, which makes this option more secure yet prevents equality searches, grouping, indexing and joining on encrypted columns.
Deterministic encryption is especially weak when used for small set of unique values making it too easy to decipher those. If you going to take 70-473 Microsoft exam you should be very clear on these encryption types and their limitations and be able to translate use case requirements into right encryption settings.
We will choose Deterministic. Select Next to continue.
Choose Azure Key Vault, the Subscription, and the Azure Key Vault you will use to store the Master Key. This window will prompt you to sign into Azure with your Azure AD Account to provide the subscription and Key Vault you want to use to store your Master Encryption Key. Keep in mind, the account you specify will need to be specified in an Azure Key Vault Access Policy that grants the ability with the account you are using to work with Keys. For example, here’s the ShudKeyVault Access Policy.

Back to the Master Key Configuration, verify all options.

Click Next to Continue after verifying the Azure AD Account, the Subscription, and Azure Key Vault along with its access policy.
Choose “Proceed to finish now.”

Click Next to Continue then click Finish.
Our encryption has successfully completed.

Now let’s try to view those columns again.
Right-Click the SalesLT.Customer Table and choose “Select Top 1000 Rows.”
Now our results look a bit different. We can see the EmailAddress column and Phone column are encrypted.

Viewing our encrypted data with our Admin Account
As mentioned earlier, our data was encrypted using our Azure AD Account while logged on with our eshudnow SQL Account. We’ll want to be able to sign into SQL with our Azure AD Account; the same account that has Azure Key Vault access to our key data.
Back in the Azure Portal, navigate back to the SQL Server and click on Active Directory Admin.

Select Set admin and select your Azure AD Account then click Save.

Back in SSMS, re-connect to your SQL Server & Database using your Azure AD Account. We’ll be using Azure Active Directory for the Authentication type rather than SQL Authentication.

If we view the SalesLT.Customer column data again, we still see it’s encrypted.
Let’s disconnect from our server and reconnect with the following Connection Parameter: Column Encryption Setting=Enabled. This tells SQL to decrypt the columns.

Let’s again go to the SalesLT.Customer Table and view the Top 1000 Rows.
Our data is successfully decrypted.
Viewing our encrypted data with an Account with no access to Azure Key Vault
So we know the following is true: our Azure AD Account we granted access to our SQL Server using Active Directory Admin that also is defined in our Azure Key Vault Access Policy with all Key permissions has the ability to decrypt our column data. What about other SQL Admins that are not defined in our Azure Key Vault policy? Will they have permissions to decrypt the column data? The answer is no. But let me show you.
We have an Azure AD Account, [email protected]. Let’s add him as a SQL Admin directly on our database.
Run the following SQL Query to add [email protected] from Azure AD and granting database owner priviledges against our blogdb database.

If we try to login, we get an access denied.

The reason why is the above query added the [email protected] user directly to the database. It does not have access to login to the server.
In order to be able to connect directly to the database, we must go to Connection Properties and specify the name of the database we are connecting to.

We will leave Additional Connection Parameters specified as “Column Encryption Setting=Enabled”
This time, we are able to successfully connect to our database. But we will have a limited view and will not be able to see any server related information in Object Explorer.
Let’s try to view the column data again.

Instead of the data being displayed, we are presented with the following error.
Msg 0, Level 11, State 0, Line 0
Failed to decrypt column 'EmailAddress'.
Msg 0, Level 11, State 0, Line 0
Failed to decrypt a column encryption key using key store provider: 'AZURE_KEY_VAULT'. Verify the properties of the column encryption key and its column master key in your database. The last 10 bytes of the encrypted column encryption key are: 'B1-FE-AC-B1-C8-B5-51-62-01-DD'.
Msg 0, Level 11, State 0, Line 0
One or more errors occurred.
Let’s go back into our Key Vault and grant [email protected] the ability to View and List Keys in our Access Policy.

Our Azure Key Vault Access Policy now has both accounts:

Now let’s try to view the SalesLT.Customer data again and see if the EmailAddress and PhoneNumber columns get decrypted. I tweaked the SQL Query a little bit to remove some of the other columns to make the screenshot smaller.

As we can see, now that [email protected] has access to Azure Key Vault with an access policy granting JDoe Key Access, JDoe can decrypt the columns.
If you look at this article here from the official docs, it discusses what is needed in order for a user or application to be granted access to encrypted column data. A user or application must be able to access the database, and must pass the Column Encryption Setting accordingly in order for the data to be encrypted. Also, as can be seen with our tests, the application also must have access to the Azure Key Vault and the application account or user must have an Access Policy within the Azure Key Vault in order for the data to be decrypted.
Thanks for reading all the way to the end. Hopefully you found this valuable. And if you have any questions, as always, feel free to comment.

Thanks for the article. What if an another sql login that has db_owner access on the database? Can this sql login decrypt the data as it does not have access to key vault? Thanks! When I tried, my sql login that has db_owner can still see the decrypted data. I am expecting the sql login should not see the decrypted data. What am I missing? Please advise. Thanks!
That’s strange. I’ve tried this a several times, completely closing sql management studio, signing out of Windows, signing back into Windows, relaunching SSMS, and it hold never decrypted for another admin account if it didn’t have access to the key in the key vault.